
You spend 3 hours every day responding to the same emails, forwarding messages to your team, and manually organizing client requests. You know automation could save you time, but you've never built a workflow before. The thought of learning a new platform feels overwhelming—where do you even start?
Sound familiar? You're not alone. Most small business owners waste 10–15 hours per week on repetitive tasks they could automate in under an hour. The good news? Creating your first automation is easier than you think.
Quick Win: Setting up your first automation takes 30–45 minutes and can save you 2–3 hours per week immediately. By the end of this guide, you'll have a working automation that handles email responses automatically—no coding required.
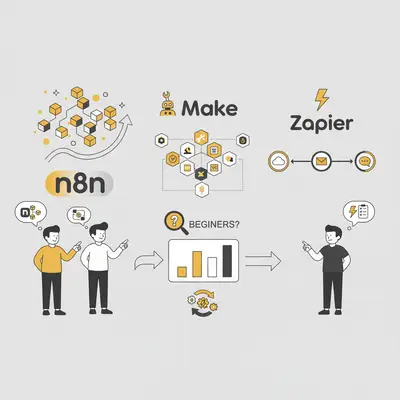
Automation platforms like n8n, Make, and Zapier connect your apps and services visually, without any programming. You can automate email responses, forward messages to your team, organize files automatically, and sync data between tools—all by connecting simple building blocks.
This step-by-step guide walks you through creating your first automation from start to finish. You'll learn how to choose the right project, pick the best platform for beginners, build a working automation, test it safely, and avoid common mistakes. By the end, you'll have a working automation that saves time every day.
Ready to automate your first task? Book a free consultation to get personalized automation recommendations for your business.
Choosing Your First Automation Project
Before you start building, you need to pick the right first project. Most beginners make the mistake of choosing something too complex—like automating their entire sales process—which leads to frustration and abandoned projects.
Reality Check: Your first automation should take 30–45 minutes to build, not 3–4 hours. Start simple, get it working, then build more complex automations. Most beginners who start with complex projects give up before finishing.
Start Small: The 30-Minute Rule
Your first automation should meet three criteria:
- Saves at least 1–2 hours per week (worth the 30–45 minute setup time)
- Low risk (won't break anything critical if it fails)
- Simple logic (one trigger, one or two actions)
Good first automation ideas:
- Email forwarding: Automatically forward emails from specific senders to your team
- Email responses: Send automatic replies to common questions
- File organization: Move files from Downloads to organized folders
- Data entry: Copy form submissions to a spreadsheet
- Notifications: Send Slack alerts when important emails arrive
Bad first automation ideas (too complex):
- Automating your entire sales pipeline
- Multi-step workflows with 10+ actions
- Workflows that require complex data transformations
- Automations that handle critical business processes
Real-World Example: A 10-Person Agency
Sarah runs a 10-person marketing agency. She spends 2 hours every morning forwarding client emails to her team and responding to common questions. Her first automation project: automatically forward client emails to the project manager and send a quick acknowledgment email.
Why this works as a first project:
- Saves time: 2 hours per week (10 hours per week × 20 weeks = 200 hours saved per year)
- Low risk: If it fails, she can manually forward emails (no business impact)
- Simple logic: New email arrives → Forward to team → Send acknowledgment
Result: Sarah built this automation in 35 minutes. It's been running for 6 months, saving her 12 hours per week. She's since built 8 more automations, all starting from this simple first project.
Key Insight: Your first automation doesn't need to be perfect. It just needs to work. You can refine it later. The goal is to get comfortable with the platform and build confidence.
How to Identify Your Best First Project
Ask yourself these questions:
- What repetitive task do I do daily or weekly? (Email forwarding, file organization, data entry)
- How much time does it take? (If it's less than 30 minutes per week, it might not be worth automating yet)
- What happens if it fails? (If failure would cause major problems, start with something lower risk)
- Is the logic simple? (One trigger → one or two actions is ideal for your first project)
Once you've identified your first project, you're ready to choose a platform.
Platform Comparison: n8n vs Make vs Zapier for Beginners
All three platforms can automate the same tasks, but they differ in pricing, ease of use, and learning curve. Here's how they compare for complete beginners.
Quick Comparison Table
| Platform | Free Tier | Easiest to Learn | Best For | Starting Price |
|---|---|---|---|---|
| Zapier | Limited (100 tasks/month) | ⭐⭐⭐⭐⭐ | Non-technical users, quick setup | $20/month |
| Make | Limited (1,000 operations/month) | ⭐⭐⭐⭐ | Visual learners, complex workflows | $9/month |
| n8n | Free (self-hosted) or limited cloud | ⭐⭐⭐ | Technical users, unlimited workflows | Free (self-hosted) or $24/month (cloud) |
Zapier: The Easiest for Complete Beginners
Best for: Non-technical users who want the simplest possible experience.
Pros:
- Easiest interface: Drag-and-drop is intuitive, templates are abundant
- Best documentation: Step-by-step guides for every integration
- Largest app library: 6,000+ integrations (source: Zapier)
- Reliable: Most stable platform with excellent uptime
- Great templates: 50,000+ pre-built workflows you can copy
Cons:
- Expensive: $20/month for starter plan (100 tasks/month)
- Limited free tier: Only 100 tasks per month on free plan
- Less flexible: Harder to customize complex workflows
- Costs add up: Each "task" (action) counts toward your limit
Real-world example: A 10-person agency uses Zapier's Starter plan ($20/month) to automate email forwarding and form submissions. They use about 800 tasks per month across 5 automations. Cost: $20/month, saves 15 hours per week.
When to choose Zapier: You're completely new to automation, want the easiest experience, and don't mind paying $20/month for reliability and simplicity.
Make (formerly Integromat): Best for Visual Learners
Best for: Users who learn visually and want more control than Zapier.
Pros:
- Visual interface: See your entire workflow on one screen
- More affordable: $9/month starter plan (1,000 operations/month)
- Better for complex workflows: Easier to build multi-step automations
- Good free tier: 1,000 operations per month (more than Zapier)
- Flexible: More customization options than Zapier
Cons:
- Steeper learning curve: More complex than Zapier (but still beginner-friendly)
- Smaller app library: 1,200+ integrations (vs Zapier's 6,000+)
- Less documentation: Fewer tutorials and guides than Zapier
- Can be overwhelming: Visual interface shows everything at once
Real-world example: A small business owner uses Make's Core plan ($9/month) to automate email responses, file organization, and social media posting. They use about 2,500 operations per month across 8 automations. Cost: $9/month, saves 12 hours per week.
When to choose Make: You want more control and flexibility than Zapier, learn better visually, and want better value for money.
n8n: Best for Technical Users (Free Option)
Best for: Users who are comfortable with technology and want unlimited free automations.
Pros:
- Free self-hosted option: Completely free if you host it yourself
- Unlimited workflows: No limits on executions (self-hosted)
- Most flexible: Can customize anything with code if needed
- Open-source: Full control over your data and workflows
- Growing community: Active community and good documentation
Cons:
- Steepest learning curve: Most technical of the three platforms
- Self-hosting required: Need technical knowledge to set up (or pay for cloud)
- Cloud pricing: $24/month for n8n Cloud (more expensive than Make/Zapier)
- Less polished: Interface isn't as refined as Zapier or Make
- Fewer templates: Not as many pre-built workflows
Real-world example: A technical founder self-hosts n8n on a $10/month VPS. They run 15 automations processing thousands of operations per month. Cost: $10/month (hosting), saves 20+ hours per week.
When to choose n8n: You're comfortable with technology, want unlimited free automations, or need maximum flexibility and control.
Recommendation by Experience Level
Complete beginner (never used automation before):
- Choose Zapier — Easiest to learn, best documentation, most reliable
Some technical experience (comfortable with apps/tools):
- Choose Make — Better value, more flexible, still beginner-friendly
Technical user (comfortable with servers/code):
- Choose n8n (self-hosted) — Free, unlimited, maximum flexibility
Pro Tip: Start with Zapier or Make for your first automation. You can always migrate to n8n later if you need more flexibility or want to save money. The skills you learn on one platform transfer to the others.
Pricing Comparison (2025)
| Plan | Zapier | Make | n8n Cloud | n8n Self-Hosted |
|---|---|---|---|---|
| Free Tier | 100 tasks/month | 1,000 operations/month | Limited executions | Free (unlimited) |
| Starter Plan | $20/month (750 tasks) | $9/month (1,000 operations) | $24/month | $10–20/month (hosting) |
| Professional | $50/month (2,000 tasks) | $29/month (10,000 operations) | $60/month | Same (hosting) |
| Best Value | Good for reliability | Best for operations/price | Good for managed hosting | Best for high volume |
Cost analysis for a typical small business (5–10 automations, ~2,000 operations/month):
- Zapier: $50/month (Professional plan)
- Make: $9/month (Core plan) — Best value
- n8n Cloud: $24/month (Starter plan)
- n8n Self-Hosted: $10–20/month (VPS hosting) — Cheapest long-term
Key Insight: For most beginners, Make offers the best balance of ease of use, features, and price. Zapier is worth the extra cost if you prioritize simplicity and reliability. n8n is best if you're technical and want unlimited free automations.
Ready to choose your platform? Book a consultation to get personalized platform recommendations based on your specific needs.
Step-by-Step Walkthrough: Automating Email Responses
Now that you've chosen your platform, let's build your first automation. We'll create an email auto-responder that sends a customized reply when you receive emails with specific keywords.
What we're building: When you receive an email with "Pricing" or "Quote" in the subject, automatically send a personalized response with your pricing information.
Time required: 30–45 minutes
Difficulty: Beginner
Platform: Works on Zapier, Make, and n8n (we'll show platform-specific notes)
Step 1: Create a New Workflow
Zapier:
- Log in to Zapier
- Click "Create Zap" (top right)
- Name your Zap: "Email Auto-Responder"
Make:
- Log in to Make
- Click "Create a new scenario"
- Name your scenario: "Email Auto-Responder"
n8n:
- Log in to n8n (cloud or self-hosted)
- Click "New Workflow"
- Name your workflow: "Email Auto-Responder"
Pro Tip: Use descriptive names for your automations. "Email Auto-Responder" is better than "Workflow 1" — you'll thank yourself later when you have 10+ automations.
Step 2: Set Up the Email Trigger
This tells your automation to start when a new email arrives.
Zapier:
- In the trigger step, search for "Gmail" (or your email provider)
- Select "New Email" trigger
- Click "Sign in to Gmail" and authenticate
- Configure trigger:
- Folder: Inbox
- Search String:
subject:(Pricing OR Quote)(only trigger on emails with these keywords)
- Click "Continue" and test the trigger
Make:
- Click the "+" button to add a module
- Search for "Gmail" and select "Watch Emails" trigger
- Authenticate your Gmail account
- Configure:
- Mailbox: Inbox
- Search Criteria:
subject:(Pricing OR Quote)
- Click "OK" and run a test
n8n:
- Click the "+" button to add a node
- Search for "Gmail" and select "Gmail Trigger"
- Click "Connect Account" and authenticate
- Configure:
- Event: Email Received
- Folder: Inbox
- Options → Search:
subject:(Pricing OR Quote)
- Click "Execute Node" to test
What to expect: The platform will check for a recent email matching your criteria. If it finds one, you'll see the email data. If not, you can send yourself a test email with "Pricing" in the subject.
Common issues:
- Authentication fails: Make sure you grant all required permissions
- No emails found: Send yourself a test email with the keywords in the subject
- Wrong folder: Double-check you're watching the correct inbox folder
Step 3: Add a Filter (Optional but Recommended)
This ensures you only respond to emails that actually need a response (not spam or internal emails).
Zapier:
- Add a "Filter" step after the trigger
- Set condition: "From Email" does not contain "@yourcompany.com" (skip internal emails)
- Add another condition: "Subject" contains "Pricing" OR "Quote"
Make:
- Add a "Router" module after the trigger
- Add a filter:
{{from}}does not contain "@yourcompany.com" - Add another filter:
{{subject}}contains "Pricing" OR "Quote"
n8n:
- Add an "IF" node after the trigger
- Set condition:
{{ $json.from }}does not contain "@yourcompany.com" - Add condition:
{{ $json.subject }}contains "Pricing" OR "Quote"
Why this matters: Without a filter, you might auto-respond to spam, internal emails, or emails you've already handled. The filter ensures you only respond to legitimate pricing inquiries.
Step 4: Create Your Response Template
Before sending the email, let's prepare the response content.
Zapier:
- Add a "Formatter" step (optional, for text formatting)
- Or proceed directly to the email action (Zapier can format in the action step)
Make:
- Add a "Text Aggregator" module (optional)
- Or format directly in the email module
n8n:
- Add a "Code" node (optional, for advanced formatting)
- Or format directly in the email node
Response template example:
Hi {{First Name}},

Thanks for your interest in our services! I've attached our pricing guide below.

Our standard packages start at $X/month and include:
- Feature 1
- Feature 2
- Feature 3

I'll follow up within 24 hours to answer any questions.

Best regards,
{{Your Name}}
Personalization tips:
- Use
{{First Name}}to address the sender by name - Include dynamic content like
{{Subject}}to reference their inquiry - Add your contact information and next steps
Step 5: Send the Automated Response
Now let's configure the email action that sends your response.
Zapier:
- Add an "Action" step
- Search for "Gmail" and select "Send Email"
- Configure:
- To:
{{From Email}}(reply to the sender) - Subject:
Re: {{Subject}}(reply with original subject) - Body: Paste your response template
- Attachments: (optional) Add pricing PDF or document
- To:
- Click "Continue" and test
Make:
- Add a "Gmail" module
- Select "Send an Email" action
- Configure:
- To:
{{from}} - Subject:
Re: {{subject}} - Body: Paste your response template (supports HTML)
- Attachments: (optional) Add file from Google Drive
- To:
- Click "OK" and run a test
n8n:
- Add a "Gmail" node
- Select "Send Email" operation
- Configure:
- To:
{{ $json.from }} - Subject:
Re: {{ $json.subject }} - Body: Paste your response template
- Attachments: (optional) Add file ID from Google Drive
- To:
- Click "Execute Node" to test
What to expect: The platform will send a test email using your template. Check your sent folder to verify it looks correct.
Common issues:
- Email not sending: Check authentication and permissions
- Wrong recipient: Verify you're using the correct field (From Email, not To Email)
- Formatting issues: Test with plain text first, then add HTML if needed
Step 6: Add Error Handling (Optional but Recommended)
This ensures you get notified if the automation fails.
Zapier:
- Go to "Zap Settings"
- Enable "Error Notification Email"
- Set up email alerts for failed runs
Make:
- Add an "Error Handler" module at the end
- Configure to send email/Slack notification on error
n8n:
- Add an "Error Trigger" node
- Connect to a notification node (Slack, Email, etc.)
Why this matters: If your automation fails (authentication expires, API error, etc.), you'll know immediately instead of discovering it days later when customers complain they didn't get responses.
Step 7: Test and Activate
Before going live, test your automation thoroughly.
Testing checklist:
- Send a test email with "Pricing" in the subject to your inbox
- Verify the trigger fires (check that the automation detected the email)
- Check the filter works (internal emails should be skipped)
- Verify the response sends (check your sent folder)
- Review the email content (make sure personalization works, no typos)
- Test edge cases:
- Email with "Pricing" but from internal address (should skip)
- Email with "Quote" in subject (should trigger)
- Email without keywords (should not trigger)
Zapier:
- Click "Test" on each step
- Once all steps pass, click "Turn on Zap"
Make:
- Click "Run once" to test the entire scenario
- Once it works, click "Save" and toggle "Active" to ON
n8n:
- Click "Execute Workflow" to test
- Once it works, toggle "Active" switch in the top right
What to expect: Your automation is now live. It will run automatically whenever a matching email arrives.
Pro Tip: Monitor your automation for the first week. Check that it's triggering correctly, responses are sending, and there are no errors. Most issues appear in the first few days.
Troubleshooting Common Issues
Problem: Automation not triggering
- Solution: Check trigger configuration, verify email search criteria, ensure authentication is valid
Problem: Sending duplicate responses
- Solution: Add a filter to check if email was already processed, or use platform's "Execute Once" feature
Problem: Personalization not working
- Solution: Verify field names match exactly (case-sensitive), test with sample data first
Problem: Attachments not sending
- Solution: Check file permissions, verify file ID/path is correct, ensure file size is within limits
How to Test Your Automation Safely
Testing is the most important step—and the one most beginners skip. A broken automation can send duplicate emails, respond to the wrong people, or fail silently for weeks.
Reality Check: Testing takes 10–15 minutes. Fixing a broken automation that's already running can take hours and cause real problems (like sending 500 duplicate emails to a client). Always test first.
Testing Methodology: The 3-Phase Approach
Phase 1: Manual Testing (5 minutes)
Before activating your automation, test each step manually:
- Test the trigger: Send yourself a test email matching your criteria
- Verify data flow: Check that each step receives the correct data
- Test the action: Verify the final action (sending email, creating file, etc.) works correctly
What to check:
- Does the trigger fire when it should?
- Does the filter work correctly?
- Does the action execute as expected?
- Are there any errors in the logs?
Phase 2: Staging Test (5 minutes)
Test with real data, but in a safe way:
- Use a test email address: Create a test@yourcompany.com email for testing
- Test with sample data: Use real-looking but fake data
- Verify output: Check that the automation produces the expected result
Example: For email automation, send test emails from a personal Gmail account to your business email. Verify the automation responds correctly without sending to real customers.
Phase 3: Production Test (5 minutes)
Once staging works, test with one real scenario:
- Test with one real case: Use a real email/case that matches your criteria
- Monitor closely: Watch the automation run in real-time
- Verify result: Check that the output is correct
- If successful: Activate the automation
- If issues: Fix and repeat Phase 2
Safety Checks Before Going Live
Checklist:
- Authentication is valid: All accounts are connected and permissions granted
- Trigger works: Tested with sample data, fires correctly
- Filter works: Tested with edge cases (internal emails, spam, etc.)
- Action works: Tested with sample data, produces correct output
- Error handling set up: Notifications configured for failures
- No infinite loops: Automation won't trigger itself (e.g., sending email that triggers automation)
- Rate limits considered: Won't hit API limits (e.g., sending 1000 emails at once)
- Data privacy: Not sharing sensitive data inappropriately
How to Verify Your Automation Works Correctly
Week 1 monitoring:
- Check logs daily: Review automation execution logs for errors
- Verify triggers: Confirm automation is firing when expected
- Spot-check outputs: Randomly verify that outputs are correct
- Monitor error notifications: Check for any failure alerts
Signs your automation is working:
- ✅ Triggers fire when expected (check logs)
- ✅ No error notifications
- ✅ Outputs are correct (spot-check a few)
- ✅ No duplicate actions (e.g., sending same email twice)
Signs your automation needs attention:
- ❌ Error notifications appearing
- ❌ Automation not triggering when it should
- ❌ Wrong outputs (e.g., sending to wrong people)
- ❌ Duplicate actions
Pro Tip: Set up a weekly review of your automations. Check logs, verify they're still working, and look for optimization opportunities. Most issues are caught in the first week.
Testing Tools and Techniques
Platform testing features:
- Zapier: "Test" button on each step, execution history, error logs
- Make: "Run once" feature, execution history, error handling modules
- n8n: "Execute Workflow" button, execution log, error trigger nodes
Best practices:
- Test with real data: Use actual emails/files/data (but in safe scenarios)
- Test edge cases: What happens with empty fields, special characters, large files?
- Test error scenarios: What happens if authentication fails, API is down, file is missing?
- Document your tests: Keep notes on what you tested and results
Common First-Time Mistakes (And How to Avoid Them)
Most beginners make the same mistakes. Here's how to avoid them—and what to do if you've already made them.
Mistake 1: Not Testing Before Activating
The problem: You build an automation, activate it immediately, and it breaks or does something wrong.
Real example: A 10-person agency set up an email forwarding automation without testing. It forwarded every email (including 200 spam messages) to their client in one day. The client was not happy.
The solution: Always test workflows manually first:
- Click "Test" or "Execute" to test each step
- Verify each step works correctly
- Test with real data (but in a safe way)
- Only activate after thorough testing
Reality Check: Testing takes 10–15 minutes. Fixing a broken automation that's already running can take hours and cause real problems. Always test first.
Mistake 2: Creating Infinite Loops
The problem: A workflow triggers itself, creating an endless loop that runs forever.
Real example: A workflow that sends an email, which triggers the email trigger, which sends another email, and so on. Result: 1,000+ duplicate emails sent in minutes.
The solution:
- Use "Execute Once" feature to prevent re-triggering
- Add conditions to check if action is needed before executing
- Use filters to exclude files/emails created by the workflow itself
Example: When organizing files, exclude files with "Organized-" prefix to prevent re-processing.
How to prevent: Before activating, ask: "Could this automation trigger itself?" If yes, add a filter or condition to prevent it.
Mistake 3: Not Handling Errors
The problem: Workflow fails silently, and you don't know until it's too late.
Real example: A backup workflow fails for 2 weeks because of a permission error. You only discover it when you need the backup—and it's not there.
The solution:
- Add error handling (error triggers, notifications)
- Send notifications when workflows fail (Slack, email)
- Add retry logic for transient errors
- Log errors to a spreadsheet for tracking
How to prevent: Always set up error notifications when creating an automation. It takes 2 minutes and saves hours of debugging later.
Mistake 4: Over-Complicating Your First Automation
The problem: You try to do everything in one automation, making it hard to debug and maintain.
Real example: A 20-step workflow that handles email forwarding, file organization, calendar syncing, and social media posting all in one. When it breaks, you can't figure out which part failed.
The solution:
- Keep workflows focused (one workflow = one task)
- Break complex workflows into smaller sub-workflows
- Use descriptive names for steps/nodes
- Add comments/documentation in workflow
Pro Tip: If a workflow has more than 10 steps, consider splitting it into multiple workflows. Simpler workflows are easier to debug, test, and maintain.
Mistake 5: Not Setting Up Proper Authentication
The problem: Workflows break when API tokens expire or authentication fails.
Real example: A social media scheduling workflow works for 3 months, then stops when the Twitter API token expires. You lose a week of scheduled posts.
The solution:
- Use OAuth authentication (not API keys) when possible
- Set up token refresh workflows
- Monitor authentication status
- Test authentication periodically
How to prevent: When setting up authentication, use OAuth (more reliable) instead of API keys when possible. Set calendar reminders to check authentication every 3 months.
Mistake 6: Ignoring Rate Limits
The problem: Workflow hits API rate limits and fails, or you get banned from a service.
Real example: A workflow processes 1,000 emails in one run, hitting Gmail's rate limit. Gmail temporarily blocks the account.
The solution:
- Use "SplitInBatches" or similar features to process in smaller groups
- Add delays between API calls
- Respect rate limits (check API documentation)
- Monitor API usage
How to prevent: Before processing large batches, check the service's rate limits. Add delays or split into smaller batches if needed.
Mistake 7: Not Documenting Your Workflows
The problem: You build an automation, it works for 6 months, then breaks. You can't remember how it works or how to fix it.
The solution:
- Add comments/notes in your workflow
- Document what each step does
- Keep a simple spreadsheet listing all your automations
- Include: What it does, when it runs, what apps it uses
Example documentation:
| Automation | What It Does | When It Runs | Apps Used | Last Updated |
|---|---|---|---|---|
| Email Auto-Responder | Sends pricing info for "Pricing" emails | When email arrives | Gmail | Jan 2025 |
| File Organizer | Moves PDFs from Downloads to folders | Daily at 2 AM | Google Drive | Dec 2024 |
Key Insight: Documentation takes 5 minutes per automation but saves hours when something breaks. Future you will thank present you for documenting your workflows.
Next Steps: Scaling from One Automation to Many
Once you have your first automation working, here's how to scale from one to many—without getting overwhelmed.
Week 1: Master Your First Automation
Goal: Get comfortable with your first automation and ensure it's working perfectly.
Tasks:
- Monitor your automation daily (check logs, verify it's working)
- Identify any issues or improvements needed
- Document what the automation does and how it works
- Celebrate your first working automation! 🎉
Time investment: 10–15 minutes per day (monitoring)
Outcome: You have one working automation saving 2–3 hours per week, and you're comfortable with the platform.
Week 2: Add Your Second Automation
Goal: Build your second automation using lessons learned from the first.
Tasks:
- Choose your next automation project (use the criteria from Section 1)
- Build it following the same step-by-step process
- Test thoroughly before activating
- Document what works and what doesn't
Time investment: 30–45 minutes (building) + 10 minutes (testing)
Outcome: You have two working automations, and you're building confidence.
Week 3–4: Build Your Automation Library
Goal: Add 2–3 more automations, building your library of time-saving workflows.
Tasks:
- Identify 2–3 more automation opportunities
- Build each one following the same process
- Create a simple inventory of all your automations
- Review and optimize existing automations
Time investment: 2–3 hours total (spread across 2 weeks)
Outcome: You have 4–5 working automations saving 10+ hours per week.
Month 2: Advanced Automations
Goal: Build more complex automations and optimize your existing ones.
Tasks:
- Combine workflows (chain them together)
- Add error handling to all automations
- Optimize workflows for performance
- Create sub-workflows for reusable logic
Time investment: 3–4 hours total
Outcome: You have a robust automation library with error handling and optimization.
Ongoing: Maintenance and Optimization
Goal: Keep your automations running smoothly and identify new opportunities.
Monthly tasks:
- Review all automations for errors (15 minutes)
- Identify new automation opportunities (30 minutes)
- Optimize slow or inefficient workflows (30 minutes)
- Update documentation (15 minutes)
Time investment: 1.5 hours per month
Outcome: Your automations stay reliable, and you continuously save more time.
How to Identify Your Next Automation Opportunities
Ask yourself weekly:
- What repetitive task did I do this week? (Email forwarding, data entry, file organization)
- How much time did it take? (If 1+ hours per week, consider automating)
- Is the logic simple? (One trigger → one or two actions)
- What's the risk if it fails? (Low risk = good candidate)
Common automation opportunities:
- Email management: Auto-forwarding, auto-responding, organizing
- File organization: Moving files, renaming, organizing by date/type
- Data entry: Copying form submissions to spreadsheets, syncing data
- Notifications: Slack alerts for important emails, calendar reminders
- Social media: Auto-posting, scheduling, cross-posting
- Backups: Automatic file backups, data syncing
Reality Check: Building one automation takes 30–45 minutes. Building 10 automations takes 5–6 hours. But those 10 automations can save you 20+ hours per week. The time investment pays off quickly.
Building Your Automation Inventory
Keep a simple spreadsheet or document listing all your automations:
Template:
| # | Automation Name | What It Does | Time Saved/Week | Apps Used | Status | Last Updated |
|---|---|---|---|---|---|---|
| 1 | Email Auto-Responder | Sends pricing info | 2 hours | Gmail | Active | Jan 2025 |
| 2 | File Organizer | Organizes Downloads | 1 hour | Google Drive | Active | Jan 2025 |
| 3 | Form to Sheet | Copies form data | 30 min | Google Forms, Sheets | Active | Dec 2024 |
Benefits:
- See all your automations at a glance
- Track time saved (motivation!)
- Identify automations that need attention
- Share with team members
When to Consider Professional Help
Consider hiring an automation expert if:
- You have 10+ automations and they're getting complex
- You're spending more time fixing automations than they save
- You need enterprise-level features (team collaboration, advanced security)
- You want to automate complex business processes (entire sales pipeline, customer onboarding)
Cost vs. value:
- DIY: Free (your time) — Good for simple automations, learning
- Agency/Expert: $500–2,000 one-time setup — Good for complex automations, saving your time
- Ongoing management: $100–500/month — Good for maintaining 10+ automations
Key Insight: Most small businesses can handle 5–10 simple automations themselves. Beyond that, or for complex automations, professional help often provides better ROI than DIY.
Ready to scale your automations? Book a consultation to get a personalized automation strategy for your business.
Conclusion
You don't need to be a developer to automate your business tasks. With platforms like n8n, Make, and Zapier, you can create your first automation in 30–45 minutes—even as a complete beginner.
What you've learned:
- How to choose the right first automation project (start small, low risk, simple logic)
- How to compare platforms (Zapier for ease, Make for value, n8n for flexibility)
- How to build a working automation step-by-step (7 detailed steps)
- How to test safely (3-phase testing approach)
- How to avoid common mistakes (7 mistakes and solutions)
- How to scale from one to many automations (week-by-week plan)
Your next steps:
- Choose your first project using the criteria in Section 1
- Pick a platform based on your experience level (Zapier for beginners, Make for value, n8n for technical users)
- Build your first automation following the step-by-step guide in Section 3
- Test thoroughly using the 3-phase testing approach
- Scale gradually using the week-by-week plan in Section 6
Remember:
- Start simple (one trigger, one or two actions)
- Always test before activating
- Document your workflows
- Monitor for errors
- Scale gradually
Your first automation will save you 2–3 hours per week. Within a month, you can have 5–10 automations saving 15–20 hours per week. The time investment pays off quickly.
Ready to create your first automation? Book a demo with Evalics to get personalized automation recommendations and expert setup assistance for your business.
By Kevin Michael Schindler, AI Automation Expert at Evalics
What's your biggest automation challenge? Share your experience with your first automation in the comments below.