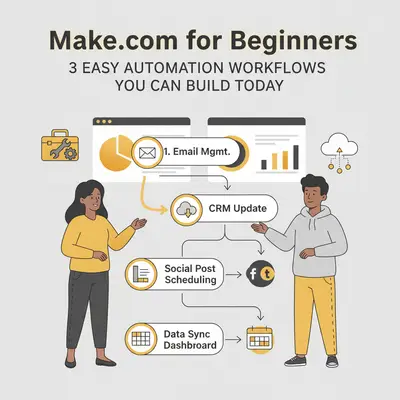
Make.com for Beginners: 3 Easy Automation Workflows You Can Build Today
Feeling buried under a mountain of repetitive tasks? You're not alone. For many business owners, manual data entry, copy-pasting between apps, and endless notifications are a daily reality that drains time and kills productivity. What if you could put those tasks on autopilot?
That's where Make.com comes in. Make is a powerful visual automation platform that lets you connect your favorite apps—like Google Sheets, Stripe, and Slack—and build automated workflows without writing a single line of code. Its drag-and-drop interface makes it incredibly beginner-friendly.
In this guide, we'll walk you through three simple, practical automation scenarios you can build today to reclaim your time and focus on what truly matters.
What is Make.com and How Does It Work?
Before we dive in, let's cover the basics. Think of Make.com as a digital assembly line for your data. You tell it what to do, and it carries out the process automatically. The core concepts are simple:
- Scenarios: A scenario is the complete automation workflow. It's the visual map of your process from start to finish.
- Modules: These are the building blocks of your scenario. Each module represents an app (like Gmail or Trello) and performs a specific action (like "Watch Emails" or "Create a Card").
- Connections: This is how you grant Make.com secure access to your apps. You only need to set up a connection once per app.
The magic happens in the visual editor, where you drag modules onto a canvas and link them together to create a logical flow for your data. Businesses are increasingly adopting automation to boost efficiency, making it a key skill for modern professionals.
Scenario 1: Log New Stripe Customers in Google Sheets
The Goal: Automatically create a new row in a Google Sheet for every new customer in your Stripe account. This creates a simple, real-time customer database without any manual data entry.
Step-by-Step Guide:
- Start a New Scenario: From your Make.com dashboard, click "Create a new scenario."
- Select the Trigger: Search for and select the Stripe module. Choose the Watch Events trigger. This will watch for new activity in your Stripe account.
- Configure the Trigger: Connect your Stripe account. When prompted, select the
customer.createdevent from the list. This tells Make to only run the scenario when a new customer is added. - Add the Action Module: Click the "+" to add another module. Search for and select Google Sheets, then choose the Add a Row action.
- Configure the Action: Connect your Google Account. Select the spreadsheet and the specific sheet where you want to add customer data.
- Map the Data Fields: This is the key step. For each column in your Google Sheet (e.g., "Full Name," "Email Address"), you'll select the corresponding data pill from the Stripe module. For example, you'll map
Namefrom Stripe to your "Full Name" column andEmailto your "Email Address" column. - Test Your Scenario: Click "Run once" and create a test customer in your Stripe account to ensure the data appears correctly in your Google Sheet.
- Activate: Once you're happy with the result, turn the scenario on.

Pro Tip: You can add a "Filter" between the Stripe and Google Sheets modules to only sync customers who meet certain criteria, like those from a specific country or those who have purchased a particular product.
Scenario 2: Create Trello Cards from Labeled Gmail Emails
The Goal: Automatically generate a new card in a Trello board when an email gets a specific label (e.g., "Follow Up" or "New Project"). This turns your inbox into an organized task manager.
Step-by-Step Guide:
- Start with a Trigger: Create a new scenario and select the Gmail module. Choose the Watch emails trigger.
- Configure the Trigger: Connect your Gmail account. In the settings, specify the folder to watch (usually "All Mail") and the label you want to monitor (e.g., "New Project").
- Add the Action Module: Add the Trello module and select the Create a Card action.
- Configure the Action: Connect your Trello account. Select the Board and the List where you want the new cards to be created.
- Map the Data: Use the
Subjectfrom the Gmail module for the Trello card's "Name" and theText contentfor the card's "Description." You can even map the sender's email address. - Test It: Click "Run once," then add your chosen label to an email in Gmail. A new card should instantly appear in Trello.
- Activate: Turn the scenario on to keep your tasks flowing automatically.
Reality Check: On the Make.com free plan, scenarios run at intervals (e.g., every 15 minutes). This means your task won't be created instantly, which is perfectly fine for most non-urgent workflows.
Scenario 3: Get Slack Alerts for Brand Mentions via RSS
The Goal: Monitor for new online mentions of your brand using a Google Alerts RSS feed and automatically post them to a designated Slack channel for your team to see.
Step-by-Step Guide:
- Set Up Google Alerts: First, go to Google Alerts and create an alert for your brand name. Under "Deliver to," select "RSS feed." Copy the RSS feed URL.
- Create the Trigger: In a new Make.com scenario, select the RSS module and choose the Watch RSS feed items trigger.
- Configure the Trigger: Paste the Google Alerts RSS feed URL you copied into the URL field.
- Add the Action: Add the Slack module and select the Create a Message action.
- Configure the Action: Connect your Slack account. Choose whether to post to a public channel, private channel, or direct message, and select the specific destination.
- Map the Message Content: In the "Text" field, craft your message. A good format is: "New Brand Mention: [Title] - [Link]". Map the
TitleandURLdata pills from the RSS module. - Test and Activate: Run the scenario once to pull the latest mention. If it looks good in Slack, turn it on.
Key Insight: While this example uses RSS, many apps in Make.com support webhooks, which allow for instant data transfer. As you get more advanced, using webhooks is a great way to speed up your automations.
Understanding Make.com Plans: Free vs. Paid
Make.com offers a generous free tier that's perfect for beginners. Here’s a quick breakdown:
- Free Plan: Gives you a set number of "operations" per month (e.g., 1,000). Each action a module performs, like adding a row to a sheet, uses one operation. Scenarios run at intervals, with the lowest being 15 minutes. This is ideal for learning and running simple, non-urgent workflows.
- Paid Plans (Core, Pro, etc.): Offer significantly more operations, allow scenarios to run as frequently as every 1 minute, and provide access to more advanced features. You'd typically upgrade when your automation needs become more critical or frequent.
For the latest details, check out the official Make.com pricing page.
Conclusion: Your Automation Journey Starts Now
Automation isn't just for tech giants and expert developers. With a visual tool like Make.com, anyone can streamline their work, reduce manual errors, and free up valuable time. The three scenarios we've covered are just the beginning. For more ideas, you can explore our guide on AI Automation for your business.
Key Takeaways:
- Automation is accessible and doesn't require code.
- Start with a simple, high-impact workflow to see immediate benefits.
- Understand the core concepts of Scenarios, Modules, and Connections.
The best way to learn is by doing. Pick one of the scenarios above, create a free Make.com account, and build your first automation today.
Ready to take your business automation to the next level? Our AI Automation Services can help you design and implement the perfect workflows for your needs. Book a free consultation with Evalics to discuss your workflow needs.
By Kevin Michael Schindler, AI Automation Expert at Evalics.